A base level AmScope with a AmScope MD500 5 mega pixel USB to computer camera.
I got disatisfied with it after a short time and bought a old Nikon S series microscope off Ebay and gave that minus the camera to a friend.
First of all- Get yourself a microscope and start your adventures!
When I was in about 4th grade I got a Sears chemistry set and Sears microscope for Christmas. My Dad showed joy in me actually wanting something you could learn from vs. G.I. Joes or Hot Wheels, etc... I never used the microscope much and mixed the chemicals mostly to see what drastic reactions would occur. If only someone would have told me to try some lake water to see Protozoa! I think I might have gotten hooked.
Buy an "Entry Level" microscope! (new or used) If you get really deeply involved and get a better microscope you could give that to a friend. It would probably be better than early microscopes which I think only wealthy people owned. Also keep in mind you might never even want to see higher that 40x (around 400 times magnification at the end of the eye piece). The highest objective lens that I normally use is 40x.
Used microscopes of mine such as the Nikon S series I bought were used in colleges, hospitals and research labs so it is plenty good enough for me looking at my water samples!
I also would recommend you buying a set of prepared slides. It is good to get your feet wet focusing with.

You focus in on a prepared slide or a slide with say a water sample and a cover slip with a lower objective lens such as a 4x, 5x or 10x. Now after that you can rotate the turret to a higher magnification objective. (Don't hold the objectives but the turret wheel.) When you focus with higher objectives this way they will only need a fine focus adjustment and maybe a little recentering and you are far less likely to crash the lens against the slide.

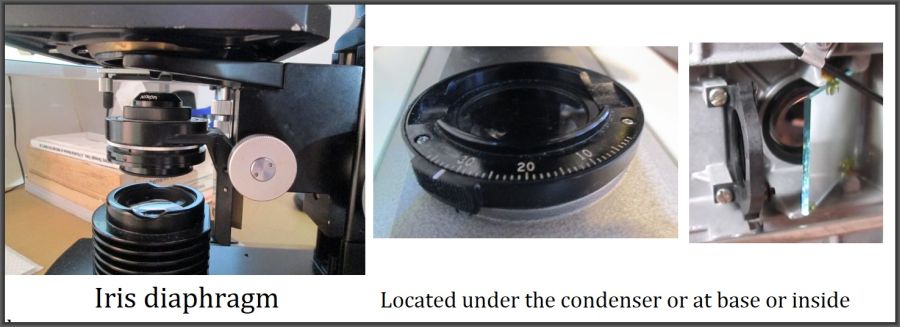
You adjust the diaphragm more to all the way closed but when go to a higher objective it has to be opened more (either and) the condenser raised. And visa versa when moving to lower objectives.
The most common water microbes you can find are- Rotifers, Paramecium, Diatoms, Vorticello, Stentors and Amoeba. You can find them in algae and rotting plant material in your birdbath water or from the bank of a lake or creek.
In winter you need to let your water sample jar warm up for a few days to get microbes to find but it still will not be as many as during summer. Another factor beside the cold temperatures outside for birdbath water is that birds bring the microbes on their feathers.
If you have a lake or creek nearby it is best not to get lazy and get samples from your birdbath as you can find many more interesting things there.
Video of a Rotifer, looks like I used a 10x objective.
Video of a Gastrotrich
Olympus BHC phase contrast microscope, PL 20x objective and phase contrast setting at 20


Video of Copepods from Strawbridge Lake


"King" is a Frontonia...probably F. leucas, but if longer than 400 micrometres, or so, it could be F. paramagna. "King" was eating...or trying to eat, at any rate. :D Frontonia are notorious gluttons, and cyanobacteria is definitely on the menu. This one couldn't get it all in, and had to back off. Here I thought he was doing a stetching trick but the real "show" would have been if that debris wasn't at the end and "Kingy" ate that long bacteria !

Directions to make one-
I used a piece of soft maple 2 5/8" wide by 1 5/8" high by 21 3/8" long.
Holes 2" to every center. I ran a strip of masking tape down the center of the stick to write all the layout marks on. That way when you're done you can just peel it off and have no marks.
A 1 1/4" wood bit is fine for RMS objective lens containers.
Eyepiece holes- For my 2 AmScope USB camera adapters which hold eyepieces the 1 1/4" bit is O.K. Otherwise I think a 15/16" bit would have been nice for eyepieces but I didn't have one.
I drilled the holes all the way through (can clean easy) clamping a backer board on while drilling to stop breakout.
Sand holes and entire block with 150 grit sandpaper.
I used a Sharpie 12 pack of colored markers and white paint (for the 100x).
I gave it two coats of water based polyurethane. Let the Sharpie ink dry 24 hours or more first! Stick and move because Sharpie ink will drag.
It would be better with a lid but for now I will use plastic sheeting or aluminum foil to cover it.

I made several versions of this tool.
The first versions use a "Sharpie" red marker to make lines.
The last one using painter's tape does not wreck the slide. All show jagged edges when magnified.
You really only need to use it once I think to get an idea of the size you are viewing.
The idea is to see how big of an area in inches or milometers you are viewing in first your eye piece and then your camera software if you are using that.
First you put a sample slide on the stage and bring it into focus.
Now remove the slide and replace it with the "View Measuring Tool."
My results were amazing to me as I never thought much about the size of the microbes.
I see a little more than 1/16" through the eye piece as I can see a whisker of the lines on each side. (Mostly tested at 10x but seems same across all)
The AmScope software on my monitor cuts a rectangle out of the view which measures less than 1/32" wide.
Here is the forum I joined and go to-
http://www.microbehunter.com/microscopy-forum/index.php
Many of the scientific classifications on this page are not from me but members of the forum. I do find some myself by web searches.
That's all for now!
DenMSHistory@outlook.com